
HOW TO STAIN YOUR DECK PERFECTLY
How to Re-stain a Deck: Step-by-Step Guide
Preparing Your Deck for Staining
Before you re-stain your deck, it’s important to ensure it’s in the best condition possible. Start by inspecting your deck for any loose surface boards or structural component problems, such as rotting or severely split wood. If you find any damaged or rotten deck boards, replace them immediately. For minor imperfections, you can use wood putty to fill in gaps. Once the deck is in good shape, power wash the surface using a garden hose with a strong spray nozzle or a pressure washer on the lowest pressure setting to thoroughly clean the wood. This will remove dirt and grime that can interfere with the stain. After cleaning, allow the deck to dry completely for two days, ensuring all moisture is gone. This is especially important if you’re using oil-based stains, as any remaining moisture in the pores of the wood will prevent proper absorption of the stain.
Sanding and Applying Stain
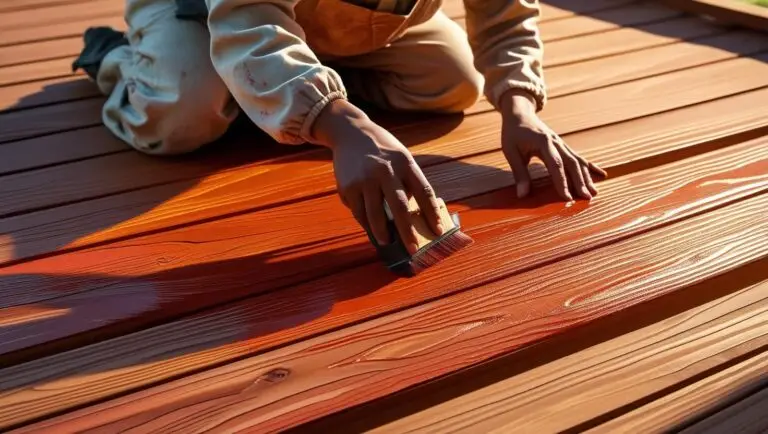
Next, sand the deck to smooth out the surface. Use a random orbital sander with 60 or 80-grit sandpaper for the main deck boards and 100-grit for the handrails. After sanding, vacuum the surface thoroughly to remove all dust. For detail work, such as balusters and trim boards, use a natural bristle brush or a synthetic bristle brush depending on whether you’re using an oil-based or water-based stain. To apply the stain, use a paint-pad applicator for the main deck surface, as this tool provides fast coverage of a large area and helps maintain a wet edge for an even application. Make sure to apply the stain liberally, allowing it to soak in as recommended by the manufacturer, then wipe off any excess with a rag to avoid pools of stain drying on the surface. If you’re using a stain-only product, finish with a clear coating to protect the wood further.
Choosing the Right Stain
Choosing the right stain and sealer is crucial for the longevity of your deck. Semi-transparent stains allow the wood grain to remain visible while adding a pop of color, while opaque stains act more like paint, hiding imperfections and providing a solid coat. If you want something that offers both color and protection, pigmented deck stains are a great choice as they penetrate and seal the wood fibers while providing UV protection to safeguard the wood from sunlight damage. For easy application, water-based coatings are often preferred because they are easy to work with, have little to no odor, and can be cleaned up with soap and water. However, if you want longer-lasting results, oil-based stains are ideal since they penetrate deeper into the wood and bond better, requiring fewer re-applications. Make sure to follow the product instructions for the best outcome.
Sweep the Deck The first tool that will simplify the job is a pressure washer. You can either purchase an electric one for around $100 to $200, or rent one for the day from your local home center.
For this job, I’m using a gas-powered model—actually, two—but I’ll explain why in a bit. Pressure washers come with different tips, and the black tip is typically the low-pressure option. I attach this tip to start, then thoroughly wet down the entire deck, including the railings and posts.
What You’ll Need
Equipment / Tools
- Power washer
- Garden hose and sprayer (optional)
- Random orbital sander
- Shop vacuum
- Paint pad applicator
- Paintbrushes
Materials
- Deck cleaner/brightener
- 60- to 80-grit sandpaper
- 80- to 100-grit sandpaper
- Wood stain
- Clean rags Warning
Using too much water-jet pressure, holding the spray nozzle too close, or using the wrong sprayer tip can etch the wood and possibly ruin some deck boards.