
How to Stain Rough-Sawn Wood
Staining Exterior Rough-Sawn Wood: Tips from Experts
When you decide to stain rough-sawn lumber, you’re opening the door to a rustic charm that adds natural warmth and texture to your exterior projects. Unlike smooth wood, rough-sawn wood has a unique surface that differs in how it absorbs staining materials. While this gives the wood a stunning, authentic look, it can also make the process a bit more difficult for homeowners who are new to the task. But, with the right steps and help, you can easily highlight the natural beauty of your wood and ensure a long-lasting finish.
At DeckStainHelp.com, experts often emphasize the importance of preserving the wood’s unique character while ensuring the stain is evenly applied. The trick lies in choosing the right stain for the job and applying it in a way that prevents uneven coloring or trouble later on. As working with rough-sawn wood differs from regular smooth wood, it requires some patience and care. For a deck restoration or any outdoor wood project, staining is an opportunity to enhance the texture and preserve the beauty for many years to come. If you have any questions, feel free to comment or seek more tips from the community!
What Is Rough-Cut Lumber?
Rough-cut lumber is wood that has been originally cut from a log but remains rough-textured, not yet sanded or smoothed. This type of wood is often used in exterior projects like fences, decking, and trim around the house. Cedar and pine are two popular types of rough-sawn lumber, both known for their unique, natural look. While rough-sawn lumber offers a more rustic and natural charm, its uneven texture can make it harder to work with, as it absorbs stains unevenly. However, it gives homeowners the opportunity to create a wood finish that highlights the grain and provides a distinctive, rugged feel to outdoor spaces.
Tips for Staining Rough Sawn Wood
- Prep the wood.
- Determine if New or Old Wood.
- Choose your Rough-Sawn Wood Stain
- How To Stain Rough-Sawn Wood Tips
- Maintaining Rough Sawn Wood
- Inspiration? Rough-Sawn Photo Gallery
Preparing Rough-Sawn Wood for Staining
When preparing rough-sawn wood for staining, it’s important to understand that this material requires a slightly different approach compared to smooth lumber. Whether the wood is new or has had significant exposure to the elements, the first step is to clean it thoroughly to remove any dirt or debris. Experienced users know that the prep process can vary depending on the condition of the rough-cut lumber, especially if it has aged or been exposed to moisture. Before applying the stain, you may need to treat the wood to ensure that it absorbs the stain evenly, allowing you to highlight its unique texture and preserve it for outdoor use.
Preparing Rough-Sawn Wood for Staining
When preparing rough-cut lumber for staining, it’s important to start with a thorough cleaning process to ensure the wood is ready to absorb the stain. Begin by using a broom or a leaf blower to remove any dust and debris from the surface. If the wood is brand-new, a simple prep may be enough, but for older or previously stained wood, more attention is needed. I recommend using a deck cleaner solution and letting it sit for a few minutes before scrubbing the surface. For surfaces with more exposure to moisture or UV, such as mold or mildew, you may need a pressure washing to effectively remove dirt and stains. In some cases, using a wood brightener or old stripper can help restore the wood to its natural state, ensuring a more even and smooth application of the stain.
My Pro Tip: Cleaning Solutions for Rough-Cut Lumber
Use a proper wood and deck cleaner when cleaning your rough-sawn cut wood. Use Restore-a-Deck’s wood cleaner and brightener kit for an exterior-friendly wood cleaner.
Penetrating vs. Film-Forming Stains: Which to Choose?
When choosing a stain for your rough-cut lumber, you’ll need to decide between penetrating stains and film-forming stains. Penetrating stains are designed to soak into the wood, filling its open pores. This helps in sealing the wood and protecting it from moisture, grime, and UV damage. These stains are often the preferred choice for rough-cut lumber because they maintain the wood’s natural texture and don’t interfere with its rustic appearance. On the other hand, film-forming stains create a top layer on the surface of the wood that acts as a protective coating, similar to traditional paint. While they provide a durable barrier against the elements, they can easily peel or flake over time, especially with rough-cut surfaces that are exposed to heavy wear.
Choosing the right type of stain depends on the level of protection you need and the look you want. If you prefer a more natural appearance and long-lasting protection against moisture and the elements, a penetrating stain may be the best option. For those seeking a coating that offers a traditional finish with a bit more durability but may require touch-ups over time, a film-forming stain might be the way to go.
Solid vs. Semi-Transparent Stains: What’s Best for Your Wood?
When staining rough-cut lumber, choosing between solid and semi-transparent stains depends on the finish you want. Solid stains offer more opaque coverage, similar to paint, which can be great for concealing imperfections on your wood or boards. They create a thicker film that helps protect against UV rays and moisture, but they can also hide the natural wood grain. On the other hand, semi-transparent stains are well-suited for those who want to show off the wood’s texture while still providing some protection. These stains add a hint of color and allow the wood grain to show through, making them perfect for a more natural look while offering moisture and UV protection. The semi-transparent option is a great balance between aesthetics and protection, as it allows the wood to soak in the stain and penetrate the pores effectively, while still providing long-lasting defense against flaking or peeling.
How to Stain Rough-Cut Lumber: Application Tips
Are you getting ready to apply stain to rough-cut lumber? Consider the following tips to ensure an even application and a beautiful, long-lasting finish.
Weather Considerations for Staining Wood
When applying stain to rough-cut wood, it’s important to check the weather forecast before you begin. Ideally, the temperature should be above 50 degrees Fahrenheit, and you should avoid direct sunlight, as it can cause the stain to dry too quickly. If rain is expected within hours, it’s best to wait until the weather clears. Staining when temperatures drop below the recommended range can prevent the wood from absorbing the stain properly, affecting the finish. It’s also important to allow the wood to dry completely between coats to ensure a lasting and even finish.
Preparing the Surface for Staining
Before you start staining your rough-cut wood, such as pine or cedar, it’s crucial to prepare the surface properly. Don’t skip this important step, even if the wood is new. Start by using a cleaner to break down any dirt, grime, or gray buildup on the surface. For stubborn dirt, you can use a stiff brush or a pressure washer to wash the wood. If the wood has an old stain, consider using a stripper to remove it, followed by a brightener to restore the wood’s natural appearance. Be cautious with excessive pressure from the washer, as it could damage the surface. After washing, ensure the surface is dry and allow the wood to dry completely. It’s also helpful to neutralize the pH of the wood to ensure the stain applies evenly and lasts longer.
Choosing the Right Application Method
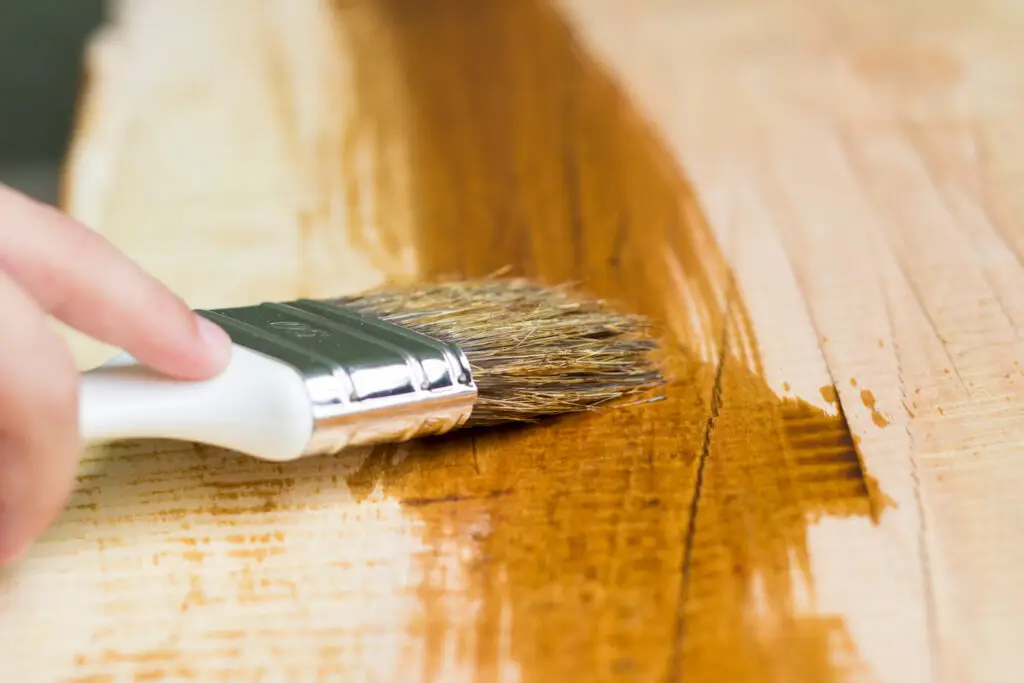
When applying stain to rough-cut lumber, there are different application methods to choose from. For tight or detailed areas, such as corners and edges, using a stiff brush or paintbrush allows you to get into the crevices and ensure even coverage. For larger surfaces, a pad or roller can help speed up the process, especially on rough or knotty spots. If you’re working with cedar or pine, and want to achieve a smooth finish, you can also consider using an airless sprayer, but be careful of overspraying and oversaturating, which could result in lap marks or a pool of stain. Regardless of the method, make sure to apply a light coat for the first and second coats, and always follow the grain to preserve the texture of the wood.
Mastering Coating Techniques
When applying stain to rough-sawn wood, there are a few effective techniques you can use to achieve a professional-looking finish. One popular method is the wet-on-wet technique, where you apply a second coat of stain before the first one dries. This allows the stain to penetrate the wood more deeply, especially in areas like boards that are thirsty for the stain. Use a rag to wipe off any excess and to help achieve a more even and lighter application. Always follow the instructions on the label of your stain, and make sure to clean your equipment using mineral spirits or soapy water to remove any leftover product. Proper protection for your hands and tools will ensure a smoother process and prevent stains from becoming permanent on your skin or equipment.
Caring for Rough-Sawn Lumber
To keep your rough-sawn lumber looking great, regular maintenance is key. Over time, dirt and debris can build up on the surface, so it’s important to clean the boards with a stiff-bristled brush. This will help remove any buildup, especially in tighter spots. For optimal results, consider doing this cleaning quarterly, during spring or fall. If you notice that the stained wood has started to lose its protective layer, it may be time to reapply the stain or a sealant to keep it safe from high-traffic areas and direct sunlight, ensuring the wood’s appearance is preserved.